How to Set Up a Simple Web Server for Development
If you are developing anything for the web, chances are you will need a web server to run things locally so you can see the result of all that code you are writing.
There are a lot of options available, but one of the easiest and quickest to get up and running is the Web Server for Chrome extension.
I am going to talk you through how you can use Web Server for Chrome to get a web server up and running in just a few minutes.
Installing Google Web Server
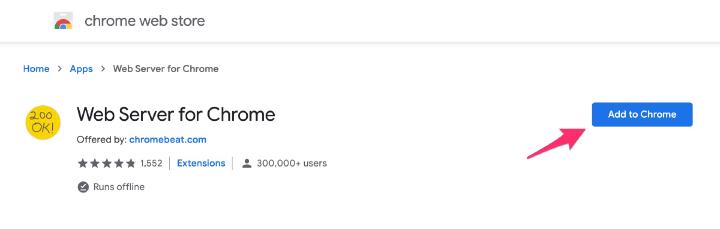
Ok, because Google Web Server is a Chrome extension , all you need to do to install it is:
- Open Google Chrome
- Go to its listing in the Chrome Web Store
- Select the Add to Chrome button
- Select Add App in the confirmation box
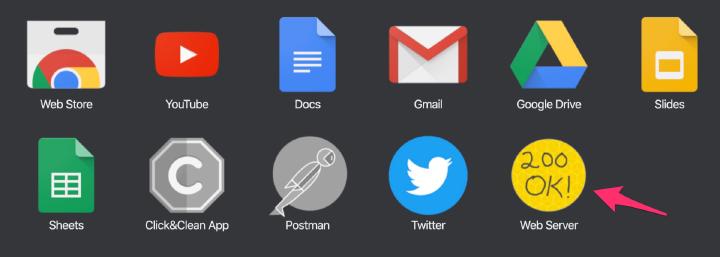
Once it has finished installing, Chrome should show you your installed apps (chrome://apps/) and Web Server should be included.
Creating the HTML Files to Serve
If you already have web files that you want the web server to serve, then you can skip this step.
If not, then let’s create a super simple HTML file to use as an example.
- Create a folder anywhere on your computer (I just created one called
web-server-demoon my desktop) - Inside that folder, create an
index.htmlfile with the following contents
<!DOCTYPE html>
<html lang="en">
<head>
<meta charset="utf-8">
<title>Web Server Demo</title>
</head>
<body>
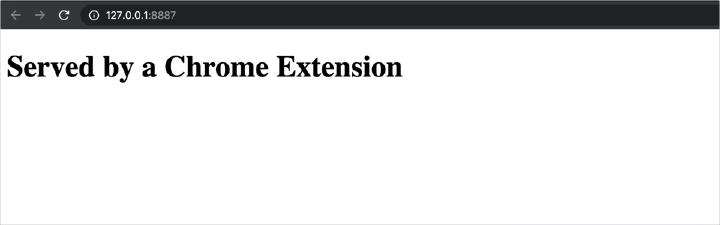
<h1>Served by a Chrome Extension</h1>
</body>
</html>
That’s it, that’s about as basic as we can get when it comes to creating something for the web.
Serving your Files
To get the extention serving your files, you just need to carry out the following:
- Open Web Server from your Chrome apps (go to
chrome://apps/)
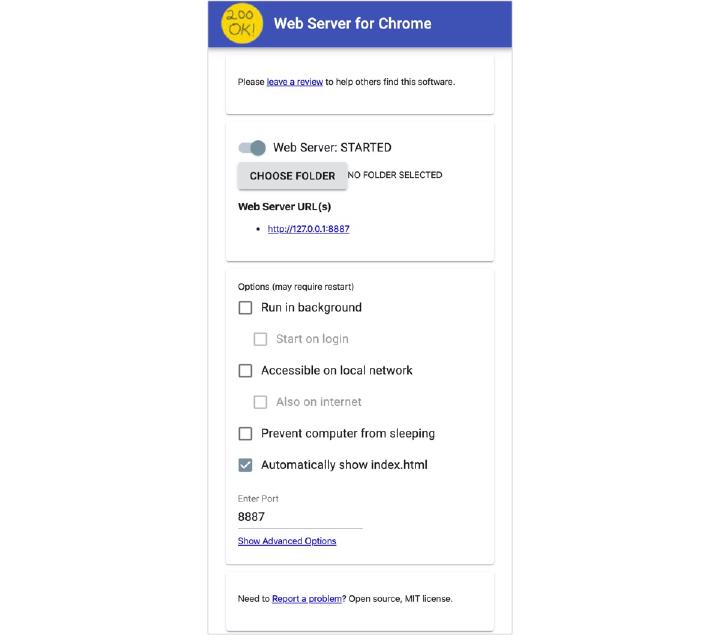
- Select the Choose Folder button and select the folder that contains the web files you want to serve (e.g. the folder you created in the previous section)
- Select the link under Web Server URL(s) to see your content (by default this will be http://127.0.0.1:8887 )
There are some additional options you can play around with if you want, but that’s it, you’ve got your own web server running.
Good work, pal 👍
Tip
If you do want to play around with the additional options then if you hover over each one, it will tell you briefly what it does.
Final Musings
The Web Server for Chrome extension is quite limited so for more advanced things, you will need to look elsewhere.
However, it’s excellent in the right circumstances, and you can’t beat how easy it is to use.
Always a pleasure, never a chore.
Jess Rascal